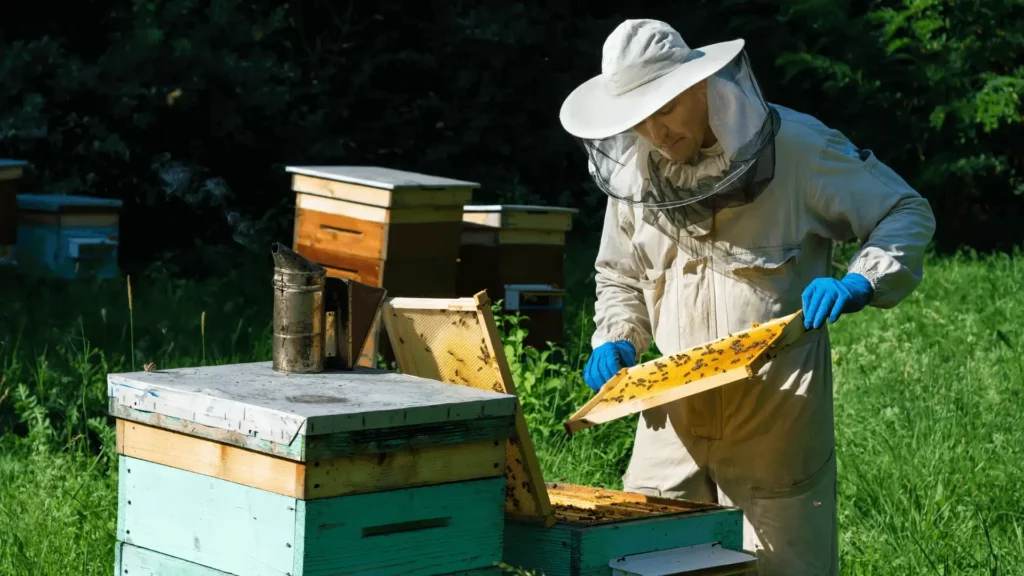
![Bee Swarm vs. Supersedure Cells: Master Queen Cell Management in Your Beehive [Expert Guide]](https://naturalbeehives.com/wp-content/uploads/2024/07/Bee-Swarm-vs.-Supersedure-Cells-Master-Queen-Cell-Management-in-Your-Beehive-Expert-Guide.webp)
Queen cells are special structures built by worker bees to raise new queens. They’re like tiny, vertical nurseries designed specifically for royalty. These cells come in different types, each with its own purpose and implications for your colony.
Imagine your hive as a busy kingdom. The queen cell is like a royal nursery, preparing for the arrival of a new monarch. Just as a human royal family might prepare for succession, bees have their own intricate system for ensuring the continuity of their colony.
There are three main types of queen cells you might encounter:
1. Swarm cells
2. Supersedure cells
3. Emergency cells
Each of these serves a unique purpose in the hive’s lifecycle and requires different responses from you as a beekeeper.
Understanding these cells is crucial for effective hive management. It’s like being able to read the secret language of your bees. By recognizing the type of queen cell present, you can anticipate your colony’s needs and take appropriate action.
For instance, swarm cells might indicate that your hive is preparing to split, while supersedure cells could suggest that the bees are planning to replace their current queen. Emergency cells, on the other hand, are a cry for help when the colony suddenly loses its queen.
As we delve deeper into each type, you’ll gain the knowledge to become a queen cell detective, decoding the mysteries within your hive.
Queen cells are specialized structures built by bees to raise new queens, and understanding their types and purposes is crucial for effective beehive management.
Types of Queen Cells: Swarm vs. Supersedure
Let’s dive into the fascinating world of queen cells and explore the two main types you’re likely to encounter: swarm cells and supersedure cells. Understanding the difference between these is like having a secret decoder ring for your hive’s plans.
Swarm Cells
Swarm cells are the beehive’s equivalent of “For Sale” signs. They indicate that the colony is planning to divide and establish a new home. These cells are typically found at the bottom edges of frames, hanging down like tiny, peanut-shaped chandeliers.
Imagine you’re in a growing family that’s outgrown its home. Swarm cells are like blueprints for a new house, signaling the bees’ intention to expand their territory.
Characteristics of swarm cells:
– Located on the bottom of frames
– Often found in multiples
– Resemble the size and shape of a Planter’s Peanut
Supersedure Cells
Supersedure cells, on the other hand, are more like “Help Wanted” ads. They indicate that the colony is planning to replace their current queen, usually due to age or poor performance. These cells are typically found on the face of the comb, often towards the middle.
Think of supersedure cells as a gentle transition of power. It’s not about expansion, but about ensuring the continued health and productivity of the existing colony.
Characteristics of supersedure cells:
– Found on the face or sides of frames
– Usually fewer in number compared to swarm cells
– Often located in the middle of the comb
Emergency Cells
While not as common, it’s worth mentioning emergency cells. These are the beehive’s version of a “911 call.” They’re created when a colony suddenly loses its queen and needs to raise a new one quickly.
Emergency cells can appear anywhere on the comb where young larvae are present. They’re often less uniform in appearance compared to planned swarm or supersedure cells.
Understanding these different types of queen cells is crucial for effective hive management. It’s like being able to read your bees’ minds, allowing you to anticipate their needs and make informed decisions about how to support your colony.
In the following sections, we’ll explore each type in more detail, providing you with the tools to become a master queen cell interpreter.
Recognizing the differences between swarm cells, supersedure cells, and emergency cells is essential for understanding your colony’s intentions and needs, enabling proactive hive management.
Characteristics of Swarm Cells
Let’s zoom in on swarm cells, those fascinating structures that signal a colony’s intention to multiply. Understanding their unique characteristics will help you spot them easily and respond appropriately.
Location is key when it comes to swarm cells. You’ll find these royal nurseries hanging from the bottom of frames, like tiny, vertical sleeping bags. Imagine miniature skyscrapers for bee royalty, dangling from the edge of the comb.
Size matters too. Swarm cells are typically the size of a Planter’s Peanut. This distinctive shape and size make them stand out from regular worker cells. Picture a peanut-shaped elevator, designed to transport a growing queen bee.
Numbers are another telltale sign. Swarm cells often appear in multiples. It’s like the bees are hedging their bets, creating several potential queens to ensure the success of their new colony.
Here’s a quick checklist for identifying swarm cells:
– Located on the bottom of frames
– Peanut-shaped and sized
– Often found in groups
– Easily visible when lifting deep boxes
Remember, spotting swarm cells is like finding treasure in your hive. It’s exciting, but it also requires swift action to prevent losing half your colony to a swarm.
Swarm cells are characterized by their location on the bottom of frames, peanut-like size and shape, and tendency to appear in multiples, signaling a colony’s preparation for swarming.
Characteristics of Supersedure Cells
Now, let’s turn our attention to supersedure cells, the hive’s way of planning for new leadership. These cells have their own unique characteristics that set them apart from their swarming cousins.
Location is again a key identifier. Unlike swarm cells, supersedure cells are found on the face or sides of frames. They’re like executive offices, positioned centrally within the hive’s operations.
Supersedure cells are often found in the middle of the comb. Picture them as corner offices in the beehive’s corporate structure, strategically placed for easy access and protection.
Numbers are another distinguishing factor. While swarm cells often appear in large numbers, supersedure cells are typically fewer. It’s quality over quantity, with the bees focusing their efforts on raising just a few potential replacement queens.
Here’s a quick guide to identifying supersedure cells:
– Located on the sides or face of frames
– Often found in the middle of the comb
– Usually fewer in number compared to swarm cells
– Not visible from the underside of boxes
Remember, spotting supersedure cells is like catching a glimpse of a royal succession plan in action. It’s a sign that your colony is proactively managing its future.
Supersedure cells are characterized by their location on the sides or face of frames, often in the middle of the comb, and typically appear in smaller numbers, indicating a colony’s plan to replace their current queen.
RELATED: Bee Hive Guide: Types & Maintenance Tips
Causes of Swarming
Ever wondered what triggers a beehive to suddenly decide it’s time to split? Let’s explore the fascinating reasons behind swarming behavior. Understanding these causes is like having a crystal ball into your hive’s future.
Lack of space is often the primary culprit. Imagine living in a house that’s bursting at the seams with family members. That’s how bees feel when their hive becomes overcrowded. This can manifest in two ways:
1. Insufficient egg-laying space: When the queen runs out of cells to lay eggs in, it’s like running out of cribs in a nursery. This shortage signals to the colony that it’s time to expand.
2. Limited comb-building space: Bees need room to construct new comb for storing honey and raising brood. When space runs low, it’s like running out of shelves in your pantry.
Seasonal triggers also play a significant role. Just as we humans might feel the urge to spring clean or start new projects as the weather warms, bees have their own seasonal rhythms. For example, the blooming of Autumn Olive can often trigger swarming behavior in some regions.
Here are some other factors that can contribute to swarming:
– Age of the queen
– Genetics of the bee strain
– Weather conditions
– Availability of nectar and pollen
It’s important to note that swarming is a natural and healthy behavior for bees. It’s their way of reproducing at the colony level. However, as beekeepers, we often try to manage this behavior to prevent losing bees and honey production.
Understanding these causes allows you to take preventive measures. It’s like being able to anticipate a growth spurt in your family and planning accordingly. By providing adequate space, managing the age of your queens, and staying attuned to seasonal changes, you can often forestall unwanted swarming.
Swarming is primarily caused by lack of space in the hive (both for egg-laying and comb-building) and seasonal triggers, but can also be influenced by queen age, genetics, and environmental factors.
RELATED: Bee Nest Types: Unraveling the Fascinating Diversity of Bee Homes
The Swarming Process
Let’s dive into the fascinating process of swarming. It’s like watching a carefully choreographed dance, with each bee playing its part in this natural spectacle.
The swarming process typically begins about 3 days before a new queen is set to emerge. Picture this as the final countdown to a big move. The hive is buzzing with excitement and preparation.
Here’s how the process usually unfolds:
1. Preparation: Worker bees start to feed the old queen less, slimming her down for flight. It’s like a pre-flight diet to ensure she’s ready for the journey ahead.
2. The Great Divide: On the day of the swarm, the old queen and about half the worker bees leave the hive. Imagine half your family suddenly deciding to move out and start a new home!
3. Temporary Pit Stop: The swarm usually settles on a nearby branch or structure. This cluster acts like a temporary base camp while scout bees search for a suitable new home.
4. Scouting Mission: Scout bees fly out in all directions, looking for potential new hive locations. It’s like sending out real estate agents to find the perfect new home.
5. Democratic Decision: Once the scouts return, they perform dances to communicate the merits of different locations. The swarm then “votes” on the best option. Talk about bee democracy in action!
6. The Final Move: Once a decision is made, the swarm takes off for their new home. It’s the final leg of their journey to establish a new colony.
Meanwhile, back in the original hive, the remaining bees continue to care for the developing new queen and the brood. It’s like ensuring the succession of the throne while half the kingdom sets off to establish a new realm.
Understanding this process can help you manage swarms more effectively. It’s like knowing the playbook of your bees, allowing you to anticipate their next move and respond accordingly.
The swarming process is a complex, organized event involving queen preparation, colony division, temporary clustering, scouting for a new home, and finally establishing a new colony, while the original hive continues with a new queen.
RELATED: Bee Hive Beetles: Identification, Life Cycle, And Control Methods
Identifying Queen Cells in Your Hive
Becoming adept at spotting queen cells is like developing a superpower in the beekeeping world. It allows you to understand your hive’s plans and take appropriate action. Let’s explore how to identify these crucial structures in different parts of your hive.
Queen cells can appear in three main locations within the comb:
1. Face of the comb: This is where you’re most likely to find supersedure cells. They’re like executive suites, prominently displayed for easy access.
2. Edge of the frame: Swarm cells often hang from the bottom edges of frames. Think of them as penthouse suites with a view.
3. Middle of the comb: Emergency cells can appear anywhere there are young larvae, including the middle of the comb. These are like hastily constructed safe rooms in times of crisis.
When inspecting your hive, use all your senses:
– Look for the distinctive peanut-shape of queen cells.
– Listen for a change in the hive’s buzz when you’re near queen cells.
– Feel for unusual bumps or protrusions on the comb surface.
Remember, timing is crucial. Queen cells at different stages of development look different:
– Early stage: Resembles a cup, like a tiny wax bowl.
– Mid-stage: Looks like an elongated peanut shell.
– Late stage: Has a rough, pitted surface as bees remove wax to thin the cap.
Here’s a pro tip: Always check the bottom of frames when you lift a box. Many beekeepers miss swarm cells because they forget to look under the frames.
By honing your queen cell identification skills, you’re equipping yourself with valuable information about your hive’s status and intentions. It’s like being able to read your bees’ diary, giving you insight into their plans and needs.
Queen cells can be found on the face of the comb, edge of the frame, or middle of the comb, with their appearance changing as they develop, making regular and thorough hive inspections crucial for timely identification.
How to Spot Swarm Cells
Swarm cells are like little alarm bells in your hive, signaling that a big change is coming. But how do you spot these crucial indicators? Let’s dive into some practical tips.
First, remember the golden rule: always check the bottom of frames. Swarm cells hang down from the bottom edge, like tiny, vertical sleeping bags. When you’re inspecting your hive, make it a habit to tilt each frame slightly forward as you lift it. This gives you a clear view of the bottom edge.
Here’s a step-by-step guide:
1. Lift the outer cover and inner cover of your hive.
2. Slowly lift each deep box, tilting it slightly forward.
3. Look for peanut-shaped cells hanging from the bottom of frames.
4. Pay extra attention to frames with empty space at the bottom.
Pro tip: Use a flashlight for better visibility, especially on bright days when shadows can obscure your view.
Remember, swarm cells often appear in groups. If you see one, there’s a good chance there are more nearby. It’s like finding one clue that leads to many more.
By mastering the art of spotting swarm cells, you’re giving yourself valuable time to manage your hive and potentially prevent unwanted swarming.
Spotting swarm cells requires careful inspection of frame bottoms, with special attention to tilting frames forward and using good lighting to identify the distinctive peanut-shaped cells
Locating Supersedure Cells
Supersedure cells are like hidden gems in your hive, often tucked away where you least expect them. Unlike their swarm cell cousins, these royal nurseries require a bit more detective work to locate. Let’s explore how to become a supersedure cell sleuth.
First, remember that supersedure cells are typically found on the sides of frames, often towards the middle of the comb. They’re like VIP suites, centrally located for maximum protection and care.
Here’s a step-by-step guide to locating supersedure cells:
1. Carefully remove a frame from the hive.
2. Examine the face of the comb, paying close attention to the middle area.
3. Look for cells that protrude from the comb surface, resembling peanut shells.
4. Check both sides of the frame thoroughly.
Pro tip: Supersedure cells are often not visible from the underside of boxes, so don’t rely on a quick glance from below.
Remember, supersedure cells are usually fewer in number compared to swarm cells. You might find just one or two, rather than a whole cluster. It’s quality over quantity in the world of supersedure.
Another key point: supersedure cells can sometimes be confused with drone cells. The difference is in the texture and direction. Supersedure cells point downward and have a pitted texture, while drone cells are smooth and point outward.
By honing your skills in locating supersedure cells, you’re gaining valuable insight into your hive’s plans for leadership succession. It’s like being privy to royal family planning!
Locating supersedure cells requires careful examination of frame sides, especially in the middle of the comb, with attention to their unique downward orientation and pitted texture.
RELATED: Master Beehive Splitting: 13 Essential Steps for Beekeepers
Queen Development Timeline
Understanding the queen development timeline is like having a peek into the royal nursery of your hive. It’s a fascinating process that unfolds over several weeks, transforming a tiny egg into the mighty monarch of the colony.
Let’s break it down day by day:
Day 0: The journey begins with an egg, no different from any other in the hive.
Day 1-3: The egg develops, preparing to hatch.
Day 3: The egg hatches into a tiny larva.
Day 3-8: This is where the magic happens! The larva is lavishly fed royal jelly, a special food that triggers queen development. It’s like a super-nutritious smoothie that turns a regular bee into royalty.
Day 8: The larva is now a queen-destined larvae. Workers cap the cell, sealing the developing queen inside.
Day 8-15: Inside the capped cell, the larva spins a cocoon and begins to transform into an adult bee.
Day 15-16: The fully formed virgin queen emerges from her cell. She’s ready to take on the world!
Post-emergence: Within a week of emerging, the virgin queen will embark on her mating flights, seeking out drones from nearby hives to mate with. These flights are a crucial part of the queen’s development, ensuring genetic diversity within the colony.
As the queen matures and begins laying eggs, she establishes herself as the central figure in the hive, responsible for perpetuating the colony’s population. Observing the queen in action is like witnessing royalty in motion, commanding respect and admiration from her subjects.
By understanding the queen development timeline, beekeepers gain insights into the intricate workings of the hive, allowing them to anticipate and manage colony dynamics effectively. It’s akin to having a backstage pass to the grand performance of a bee colony’s life cycle.
The queen development timeline unfolds over several stages, from egg to fully formed queen, showcasing the remarkable transformation process guided by nature’s intricate design.
RELATED: Revolutionize Bee Feeding: 7 Reasons Why the Bucket Bee Raft Is a Game-Changer for Beekeepers
Conclusion
As we wrap up our journey through the intricate world of queen cell management, it’s clear that mastering this skill is crucial for successful beekeeping. By understanding the differences between swarm and supersedure cells, you’re now equipped to make informed decisions about your hive’s health and productivity. Remember, whether you’re dealing with swarm cells on the bottom of frames or supersedure cells on the sides, each situation requires a thoughtful approach.
Implementing the techniques we’ve discussed will not only help prevent unwanted swarming but also open up opportunities for queen rearing and hive expansion. As you apply this knowledge, always consider the unique needs of your colony and the seasonal factors at play. With practice and patience, you’ll develop an intuitive understanding of your bees’ behavior and needs.
Thank you for investing your time in enhancing your beekeeping skills. By mastering queen cell management, you’re taking a significant step towards becoming an expert beekeeper. Keep observing, learning, and adapting – your bees will thank you for it!